Administration
Administration is where you customise TailorMate to match how your shop works. Setting this up before taking orders makes everything faster.
Go to ☰ → Administration.
1. Add Your Garment Types (Dresses)
If you want to create your own Dress, you can do it from here. You can have your Garment Name, Default Price etc. You can also customize the Measurements, and have your own labels and order. You can also select the stitch features for your garment. Once created, your Dress (garment) will appear as a selectable item when creating a new order.
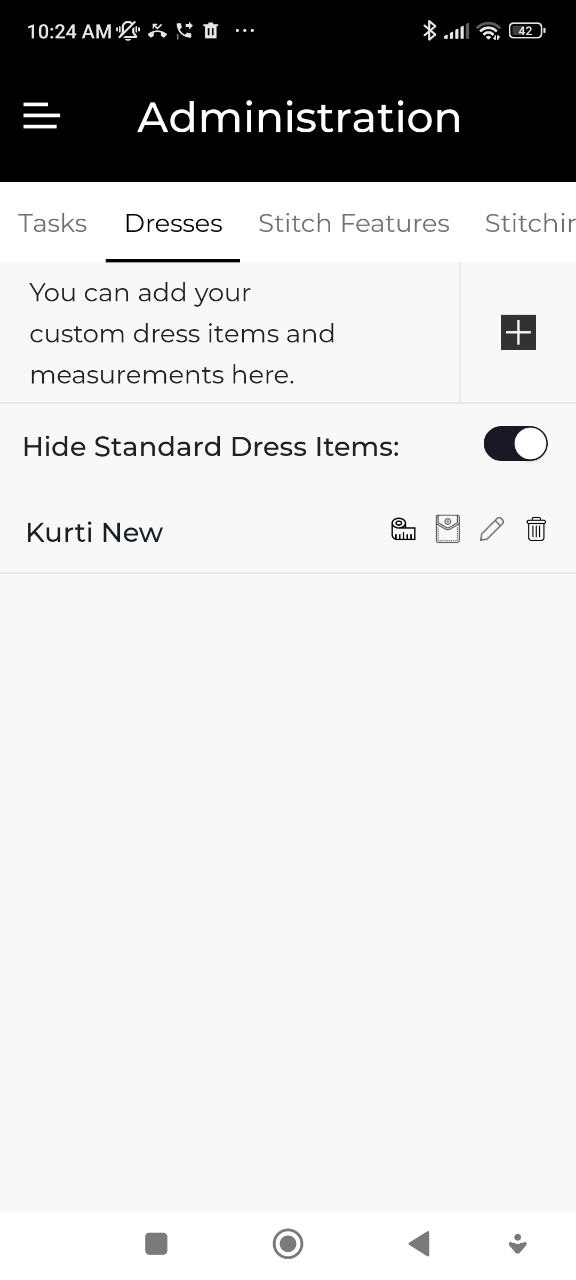
Go to Administration → Dresses and add every type of garment your shop stitches.
For each garment type you can set:
- Name (e.g., Churidar, Salwar Kameez, Saree Blouse, Kurti)
- Measurement fields — which body measurements apply
- Stitch features — sleeve styles, neck styles, etc.
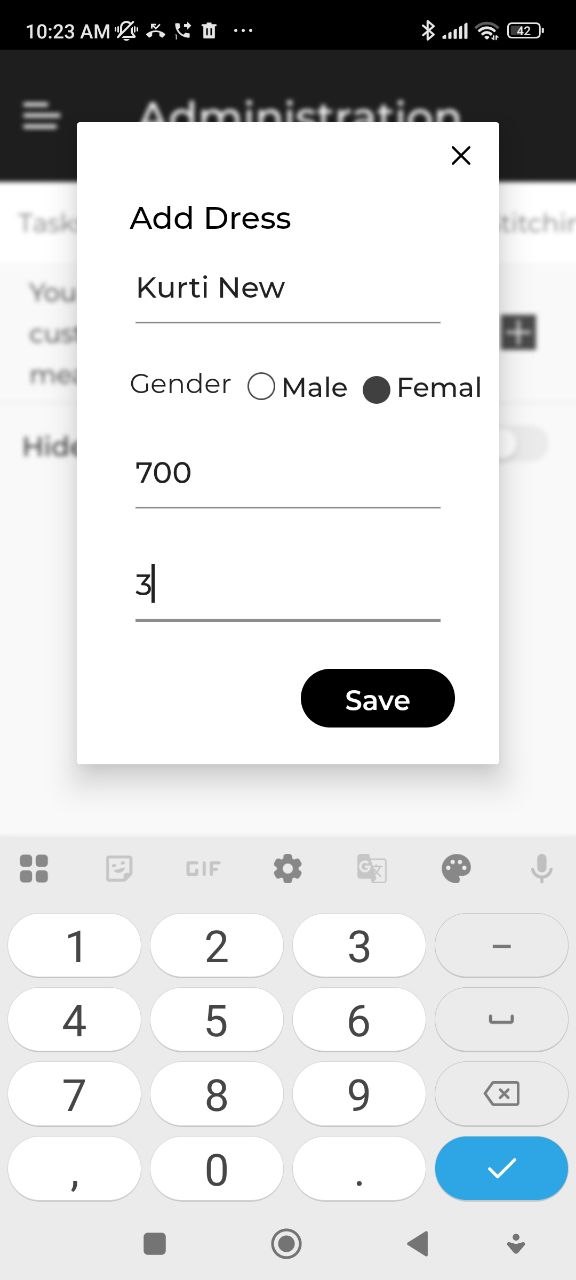
1. Add Garment / Dress
- Step 1: Open the Dresses Tab and Tap +
Enter garment Name, Default Price etc. and click Save.
- Step 2: Click Add Measurements button
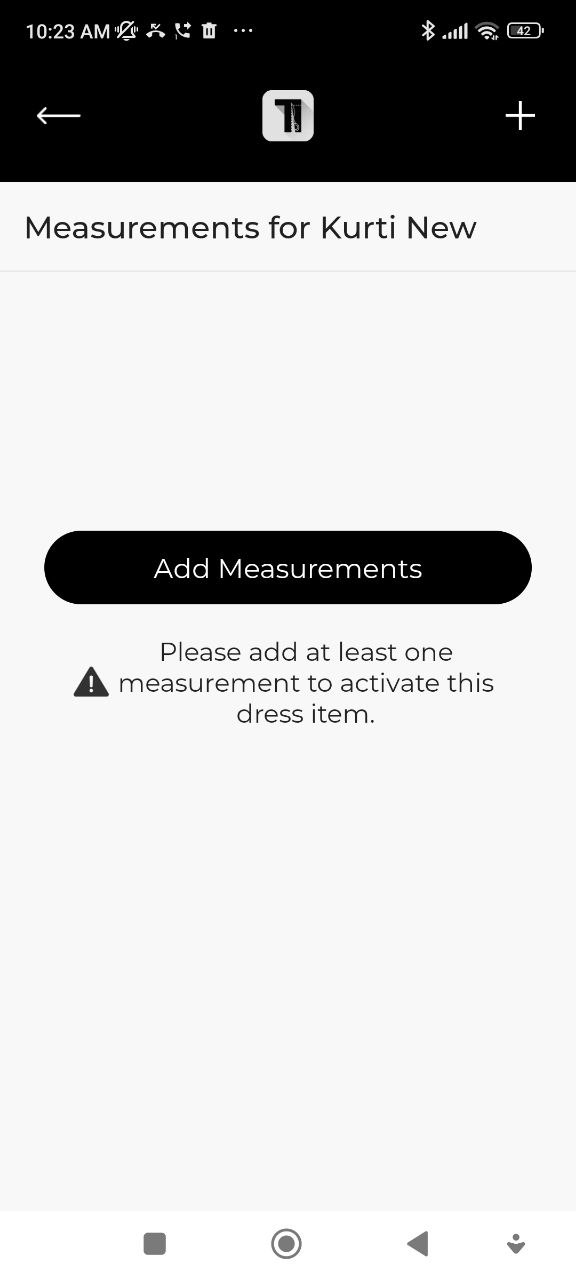
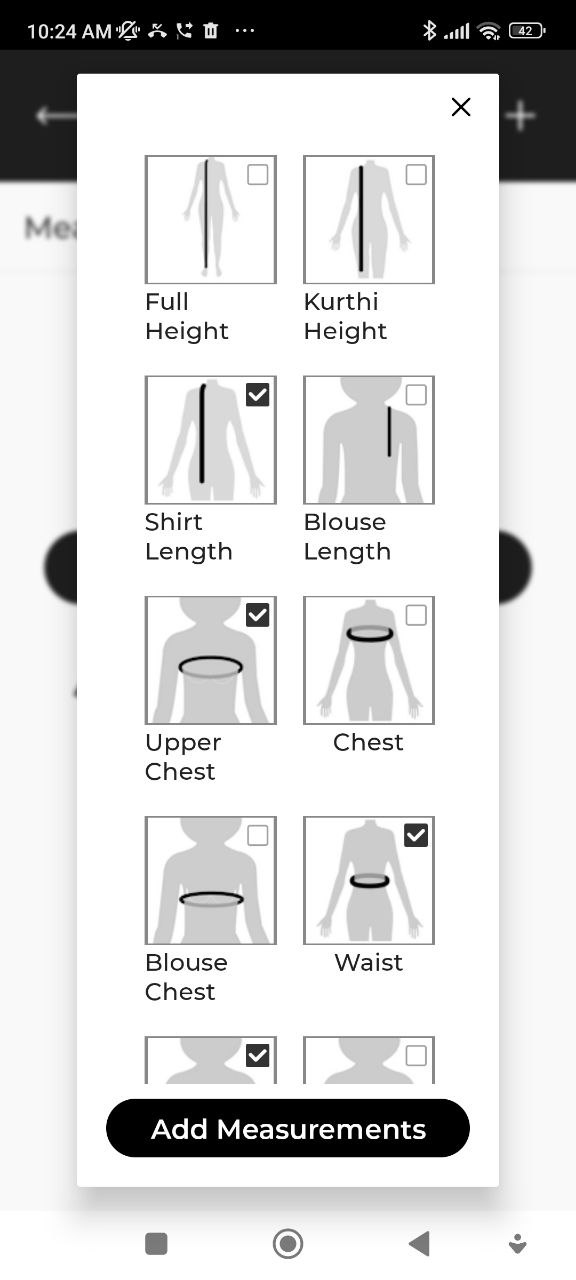
- Step 3: Select the measurement you need for this garment.
Use the check boxes with each measurement to select multiple measurements. When done, click Add Measurements button at the bottom.
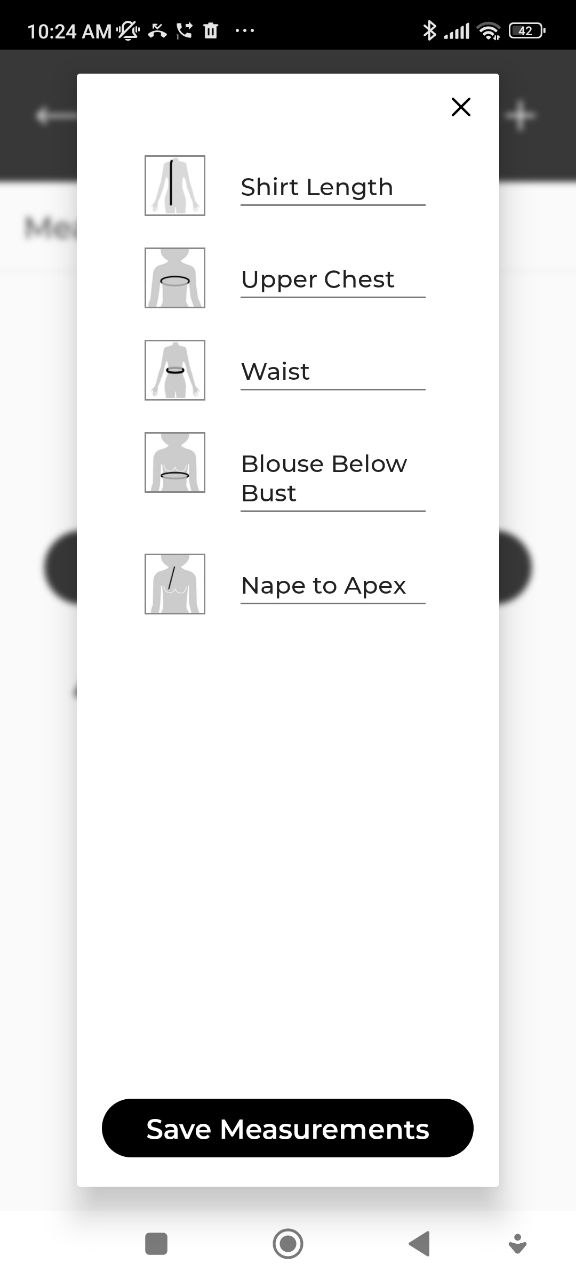
- Step 4: Rename the selected measurements.
Optionally you can rename it as would need them.
- Step 5: Change the measurements order
Optionally you can change the order of the selected measurement as you would need them while adding order.
For this, long press each measurement and move up or down.
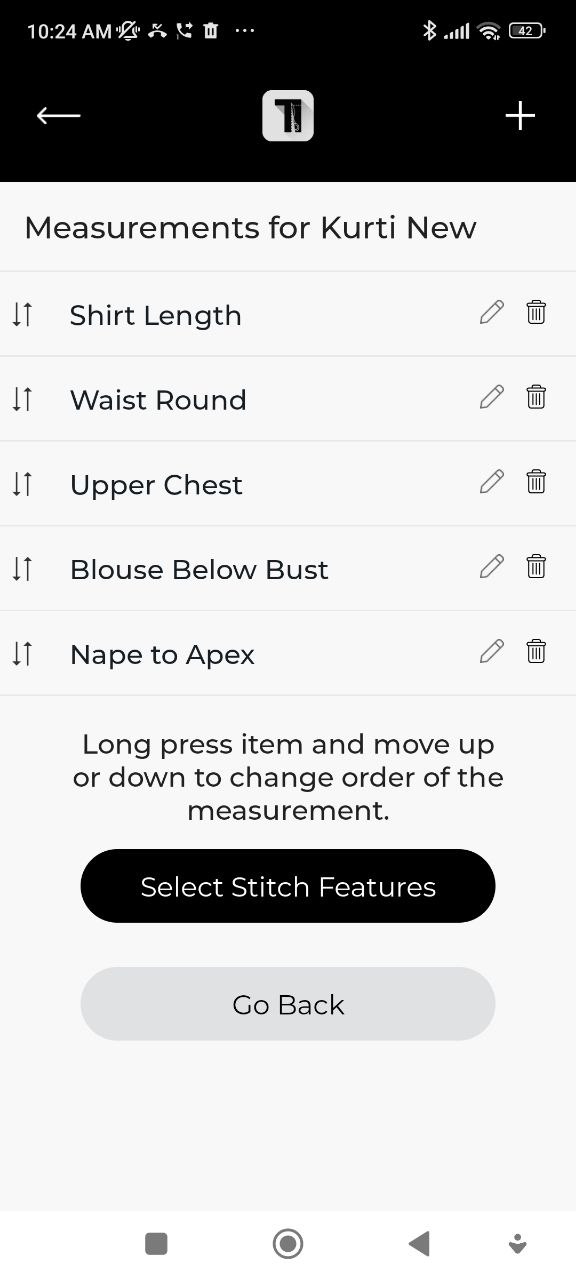
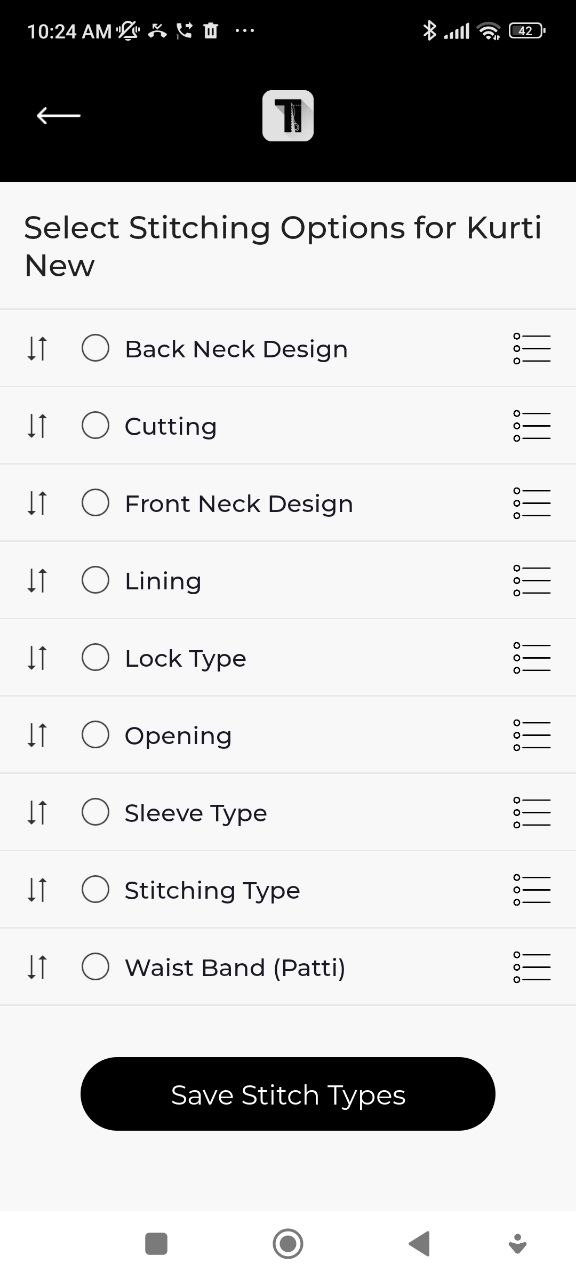
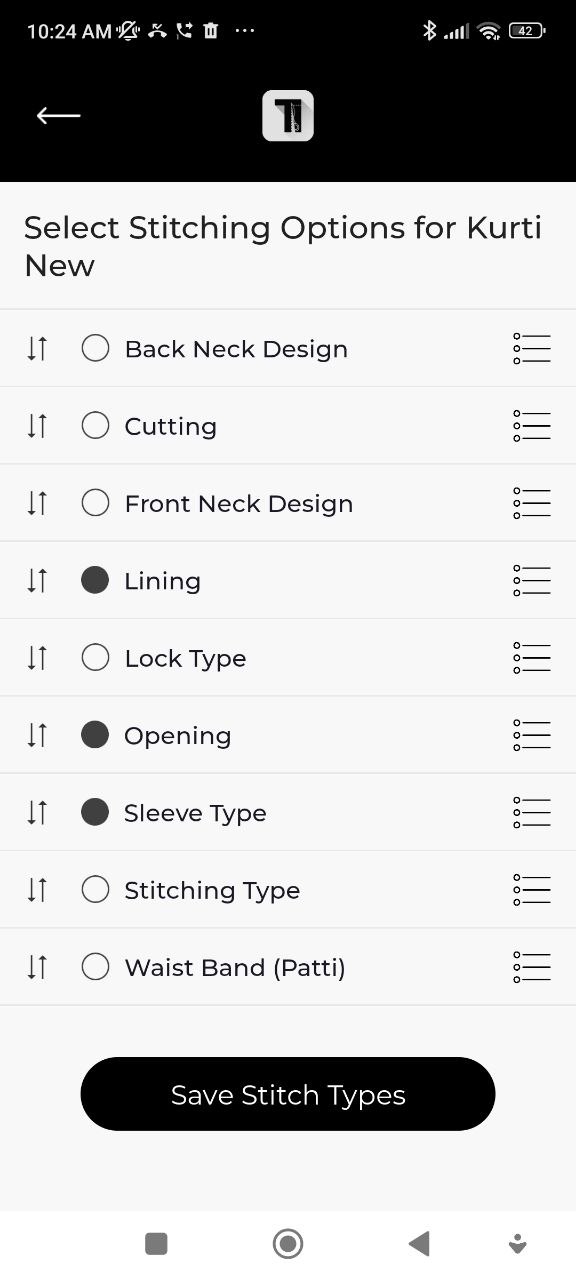
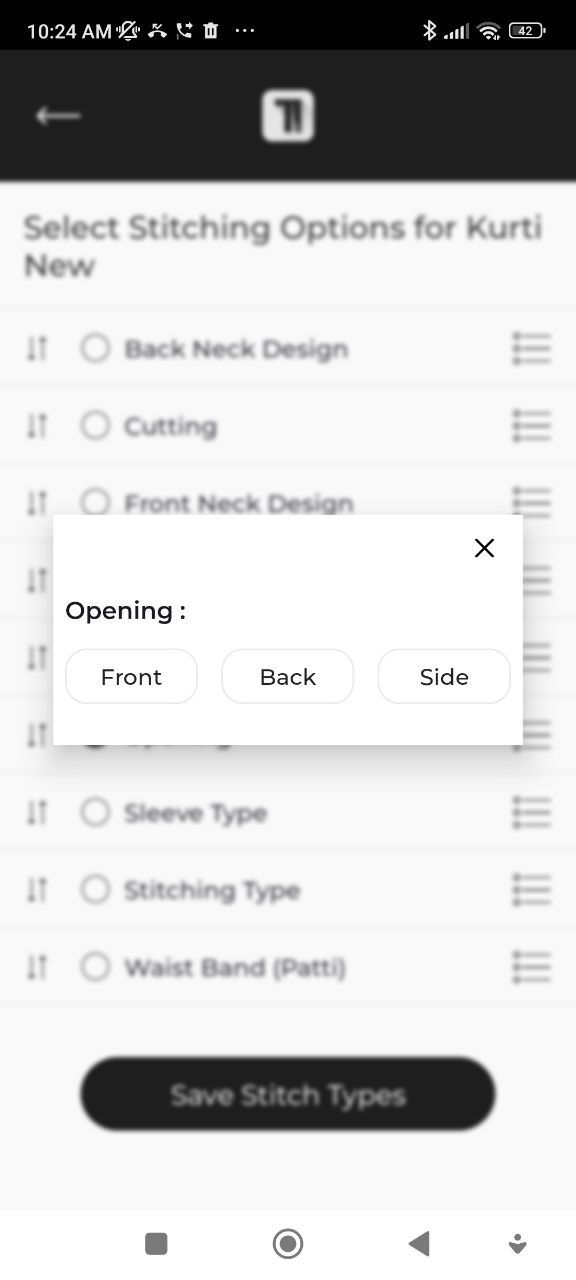
- Step 6: Select Stitching Features
Optionally you can select the the Stitching features you would need for this garment. Like Lining, Piping, Pleats, Number of Pockets, Sleeve Type etc.
- Step 7: New garment Added
You can see the new garment just got added!
You can edit anything you have eneterd during new dress creation using the buttons.
If you don't want use the standard dresses (garments) added by TailorMate while you installed the App, you can hidem them by turning on "Hide Standard Dress Items" toggle button.
2. Add Stitch Features
Go to Administration → Stitch Features to define the style options for each garment — for example:
- Sleeve styles: Full, Half, Sleeveless, Cap
- Neck styles: Round, V-neck, Boat neck, High neck
These show as selectable choices when recording measurements for an order.
3. Add Stitching Services
Go to Administration → Stitching Services to define the service tiers you offer (e.g., Standard, Premium, Express). These can be selected when creating an order.
4. Add Your Add-Ons
Go to Administration → Add-Ons and add any extras you charge for on top of the base price.
Common add-ons:
- Embroidery
- Lace
- Lining
- Piping
Set a default price for each. The price can be adjusted per order.
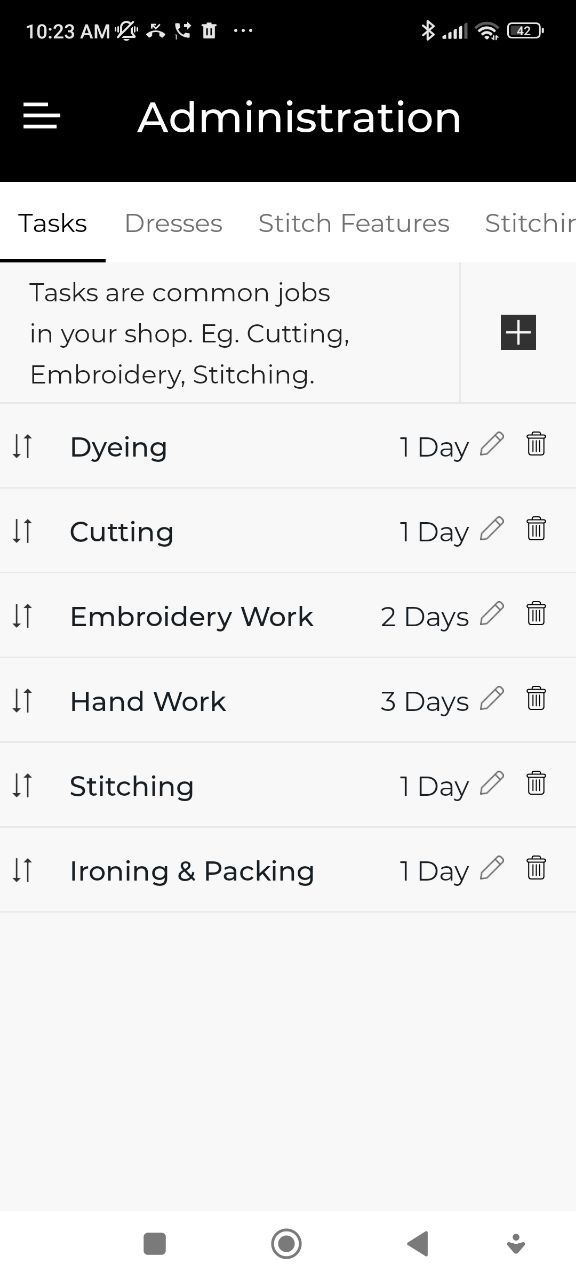
5. Add Production Tasks
Go to Administration → Tasks and add the production steps your workers follow (e.g., Cutting, Stitching, Finishing, Embroidery). Set an estimated duration for each — this is used to flag delayed jobs in the Tasks tab.
6. Set Bill Terms
Go to Administration → Bill Terms to add the default terms and conditions that print at the bottom of every bill (e.g., "Goods once sold will not be exchanged").
7. Add Expense Heads
Go to Administration → Expense Heads to define categories for recording shop expenses (e.g., Rent, Electricity, Materials, Wages).
Complete steps 1–4 before taking your first order. You can always add more garment types, add-ons, and tasks later.
For the full Administration reference, see Administration.