Setting up the App
Once your account is created, a few quick steps will get TailorMate ready for your shop.
Getting Around the App
Tap the ☰ icon at the top left to open the main menu. From here you can access every section of TailorMate.
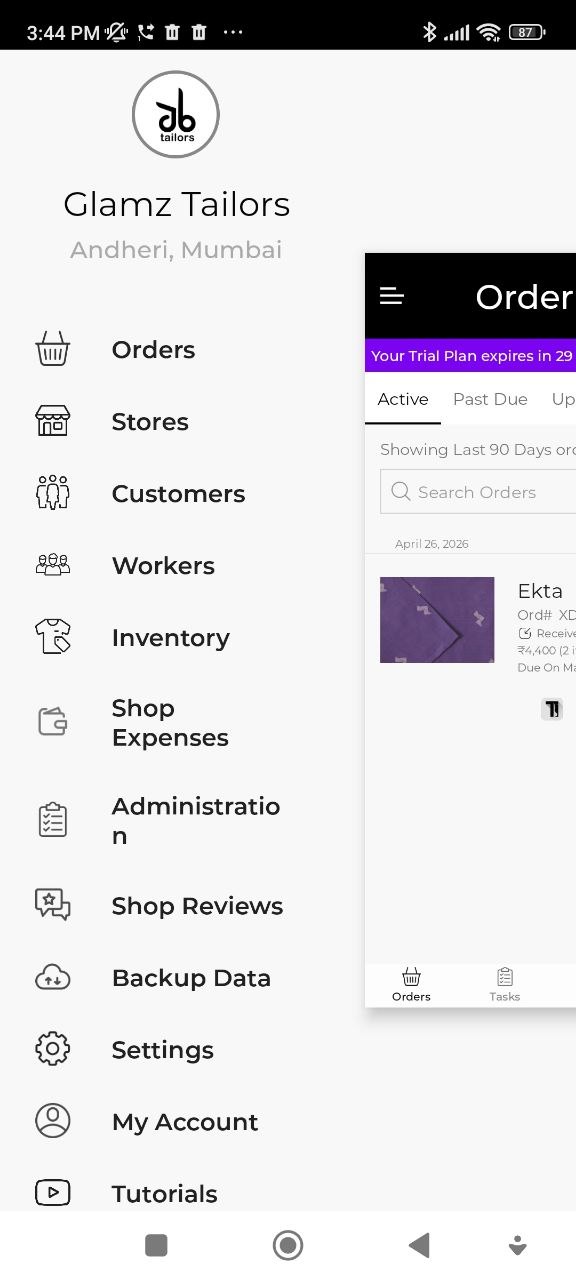
| Menu Item | What it does |
|---|---|
| Orders | View and manage all tailoring orders |
| Stores | Manage your shop locations and subscription plan |
| Customers | Your full customer list |
| Workers | Staff management, assignments, and payouts |
| Inventory | Track stock and materials |
| Shop Expenses | Record and categorise business expenses |
| Administration | Configure garment types, tasks, add-ons, and more |
| Shop Reviews | Customer feedback and ratings |
| Backup Data | Export your shop data |
| Settings | App preferences and shop profile |
| My Account | Your account details and subscription |
| Tutorials | In-app video guides |
1. Edit Shop Profile
- Tap the ☰ icon at the top left to open the main menu.
- Go to Stores menu
- Tap Edit Icon.
- Update the Shop Profile
Make sure your Shop name, Phone number, UPI, Address, and Business logo are updated. These appear on every bill you share with customers.

2. Configure App Settings
- Tap the ☰ icon at the top left to open the main menu.
- Go to Settings menu
Adjust the settings to fit your store.
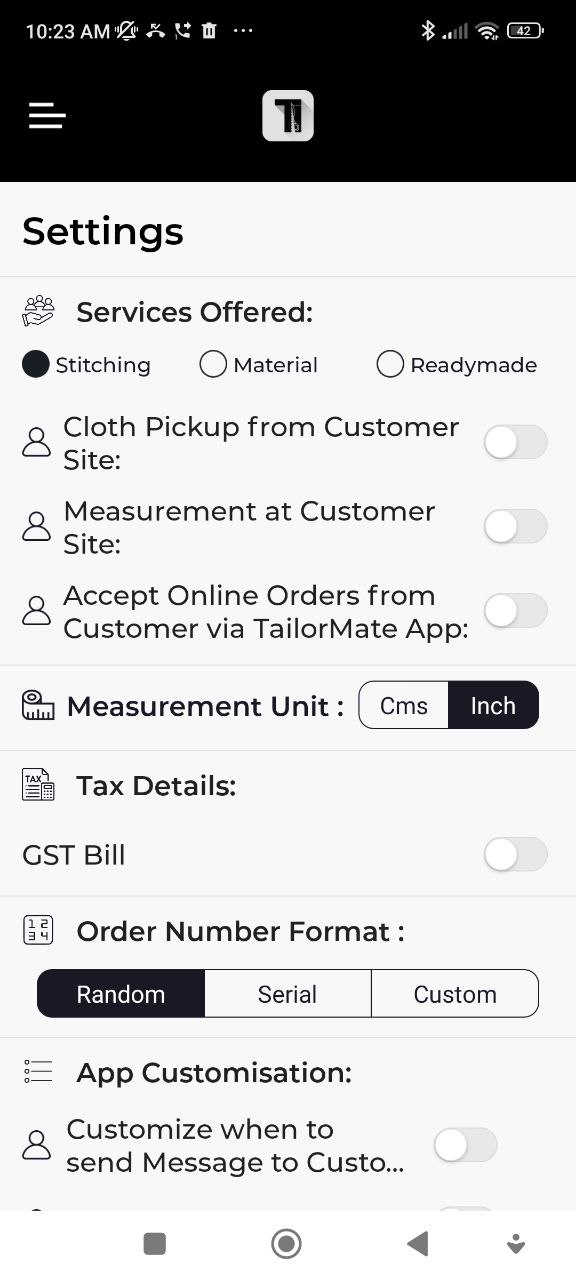
1. Services Offered
- Select which all are services you provide in your store. Only Stitching or Fabric (Material) and Readymade also.
2. Online Order Settings
- Pickup at Customer Site
- Measurement at Customer Site
- Online Orders
3. Measurement Unit
- Centimeter or Inch
4. Tax Details
- If your store has GST/VAT (based on your country), turn on this setting. You can add your GST/ VAT percentage, GST / VAT No.
Also, you can mention if the GST/VAT is included in the price entered. In this case, it will reverse calcualte the GST from the total price.
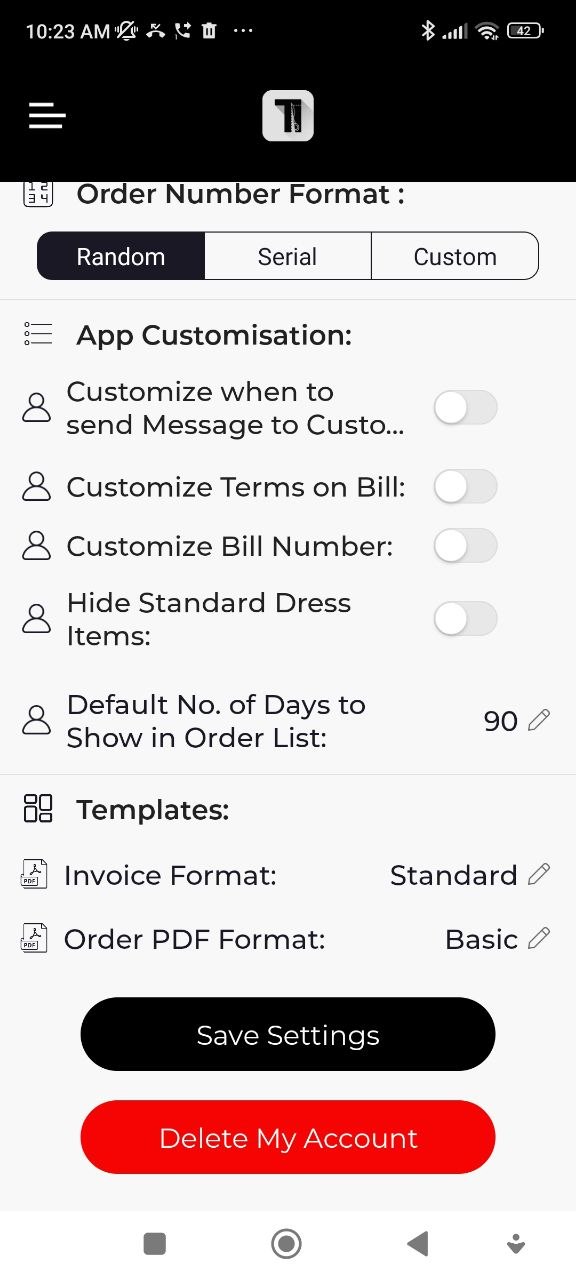
5. Order Number Format
- Random - System will assign an Order number randomly. It will of format AB123.
- Serial - Auto incremented order number from the number you give.
- Custom - System will assign an Order number randomly. But you can edit it to whatever you need.
6. App Customization
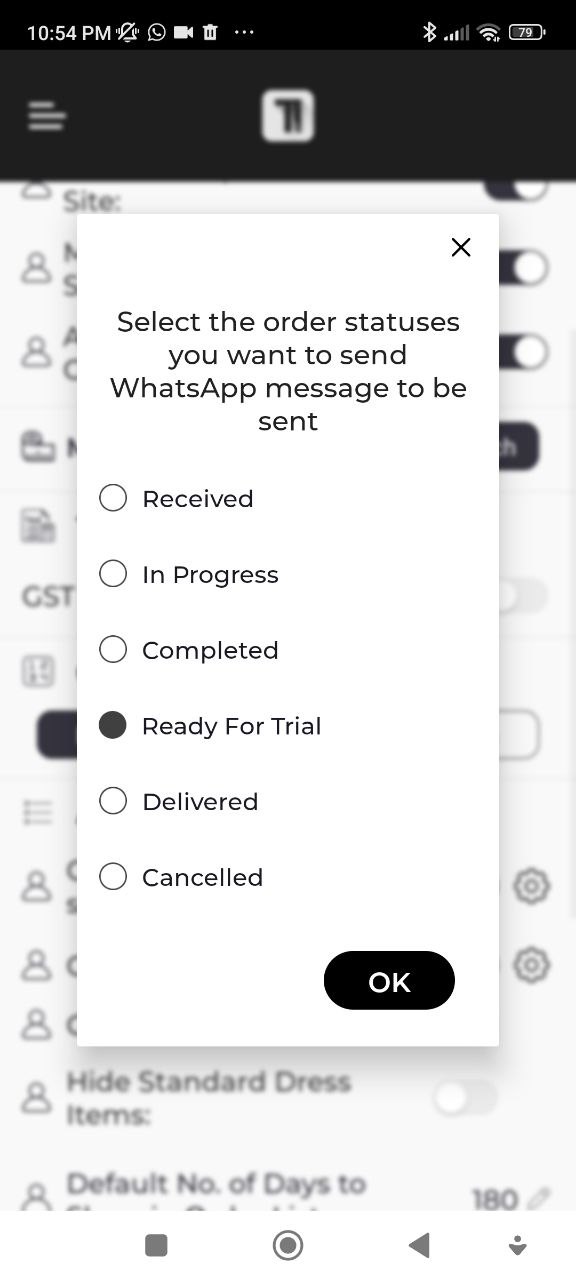
- Customize Whatsapp Messages - You can customize when to send the WhatsApp messages to your customers from TailorMate.
By defult, this setting is off, which means no customization. Whatsapp will be sent always.
If you want to send WhatsApp message only on specific Order Status say "Ready for Trial", then click the gear icon and select only "Ready for Trial"
- Customize Bill Terms - You can customize terms and conditions on Bill generated from tailorMate App.
By defult, this setting is off, which means no customization. All standard Terms are shown on bill.
If you want to show only specific Terms to be displayed, then click the gear icon and select only the ones you want.

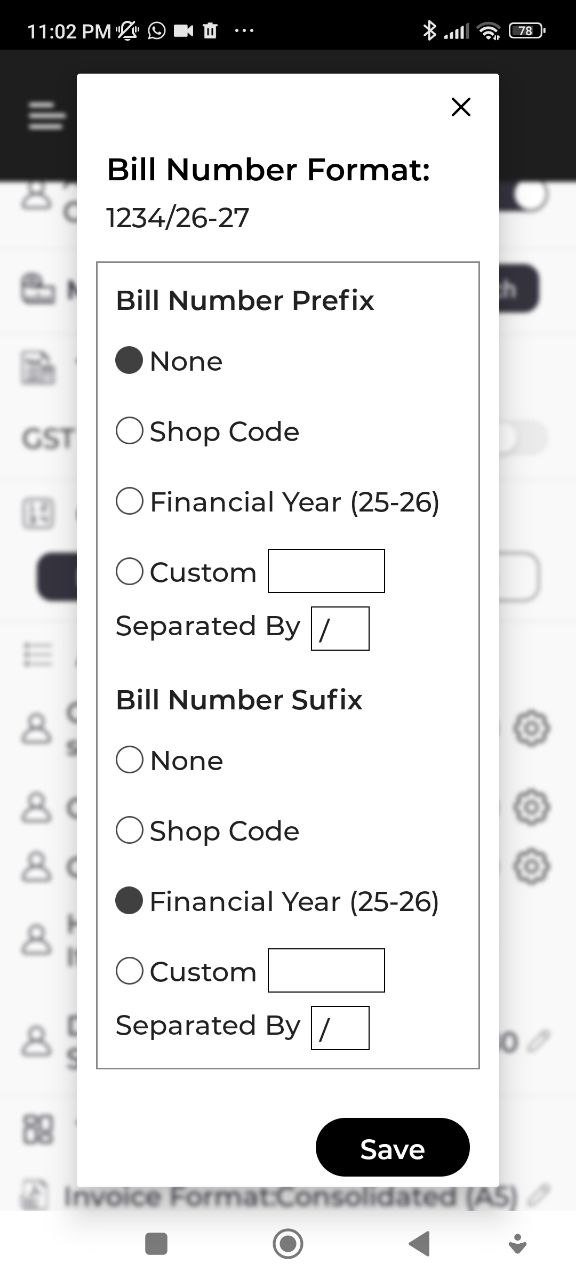
- Customize Bill Number - You can customize Bill Number generated from tailorMate App.
By defult, this setting is off, which means no customization. Standard Bill number is shown.
If you want some secific Prefix or Sufix in the Bill Number, then click the gear icon and select the options you want.
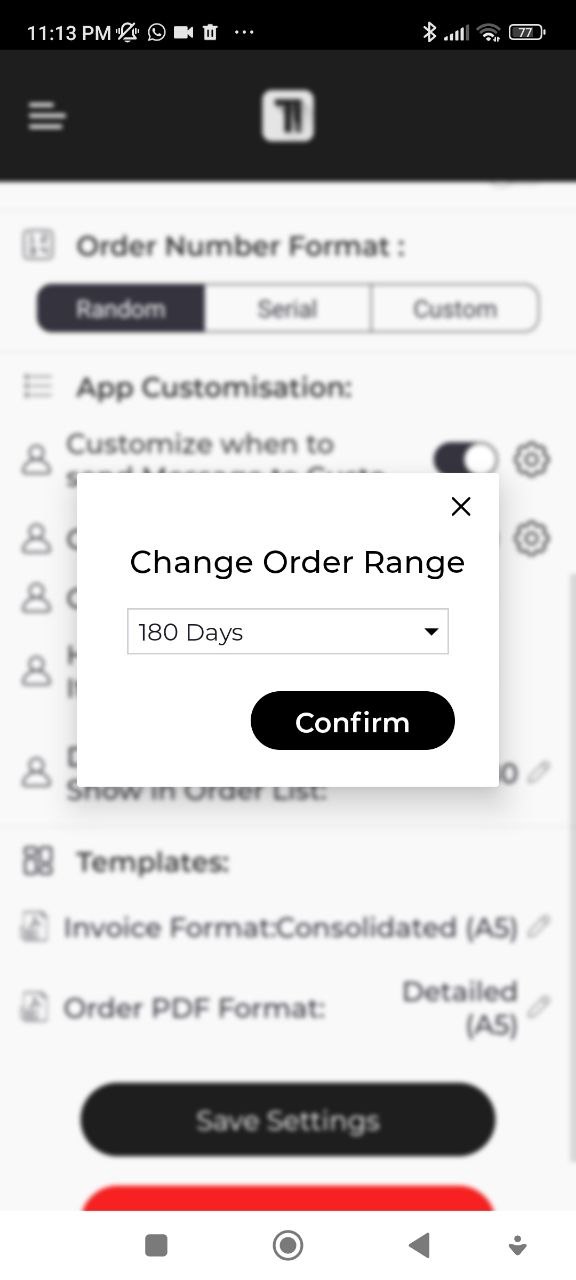
- Customize Default Number of Days - You can customize how many days orders to be shown on orders page by default.
By defult, this is set to 90 days, which means when you go to orders tab, only last 90 days orders will be shown. If you want to see older data, you can click Edit this value in orders (temporarily) or change in settings permanently.
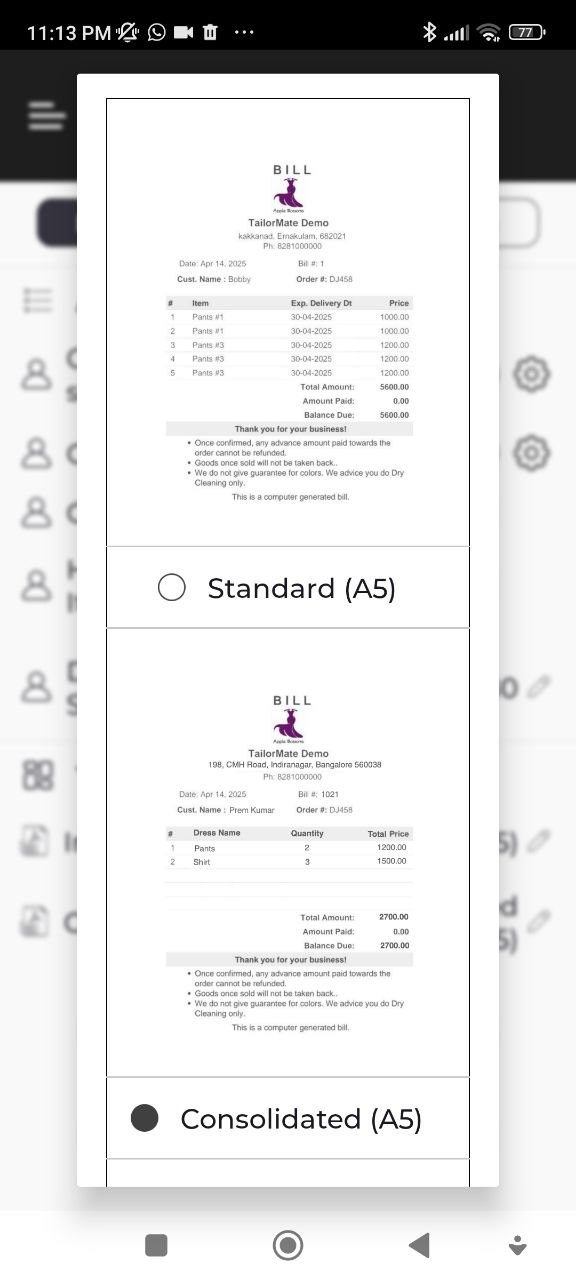
7. Select Templates - Customize Invoice Template - You can customize how invoice will look like.
Select a suitable template of your choice.
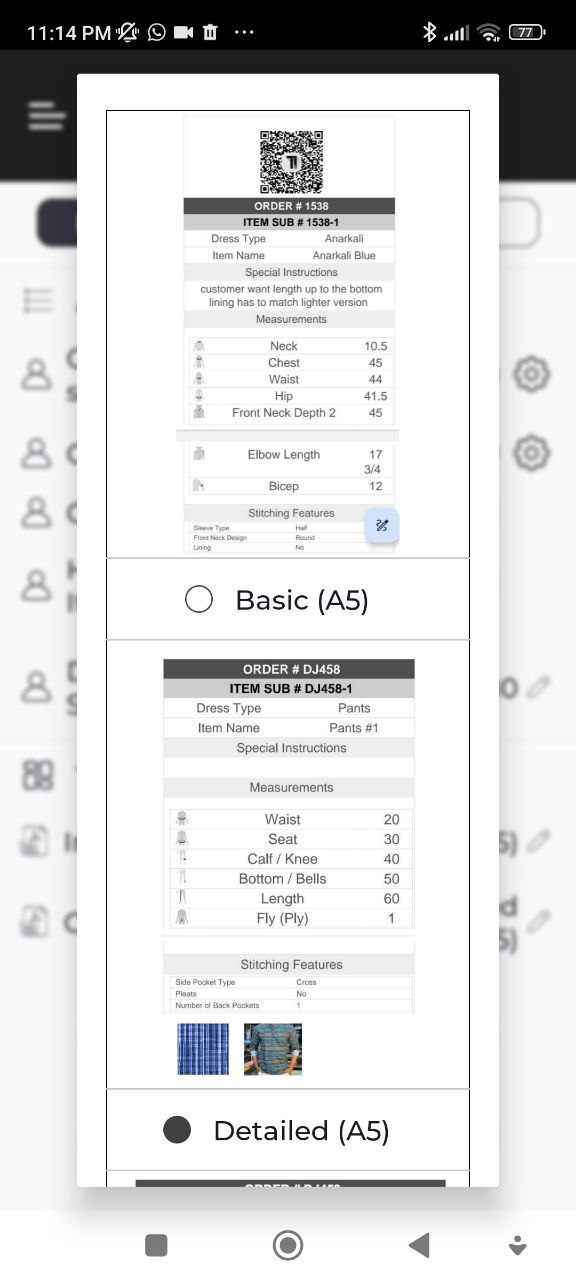
- Customize Order Form Template - You can customize how your order form will look like.
Select a suitable template of your choice.
- After you make any changes to settings , DONT FORGET to Click "Save Settings" Button..

8. Delete your Account Permanantly
- If you permanently want to delete your account, click Delete Account Button... - Be careful will delete all your Data
 .
.
Once these steps are done, you're ready to start taking orders. See Adding Your First Order for a full walkthrough.