Adding Your First Order
This guide walks you through creating a new stitching order from start to finish.
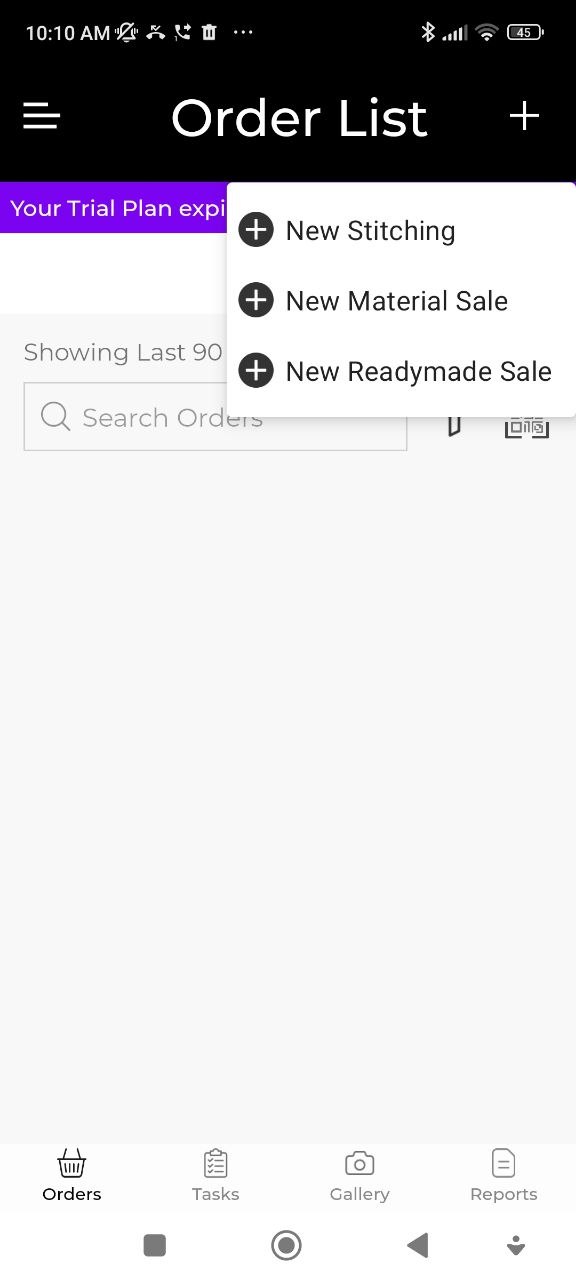
Step 1 — Open the Order List and Tap +
Go to the Orders tab at the bottom of the screen. Tap the + button in the top-right corner. A menu appears with three order types:
- New Stitching — for tailoring/stitching jobs
- New Material Sale — for selling cloth/fabric
- New Readymade Sale — for selling readymade garments
Tap New Stitching to create a stitching order.
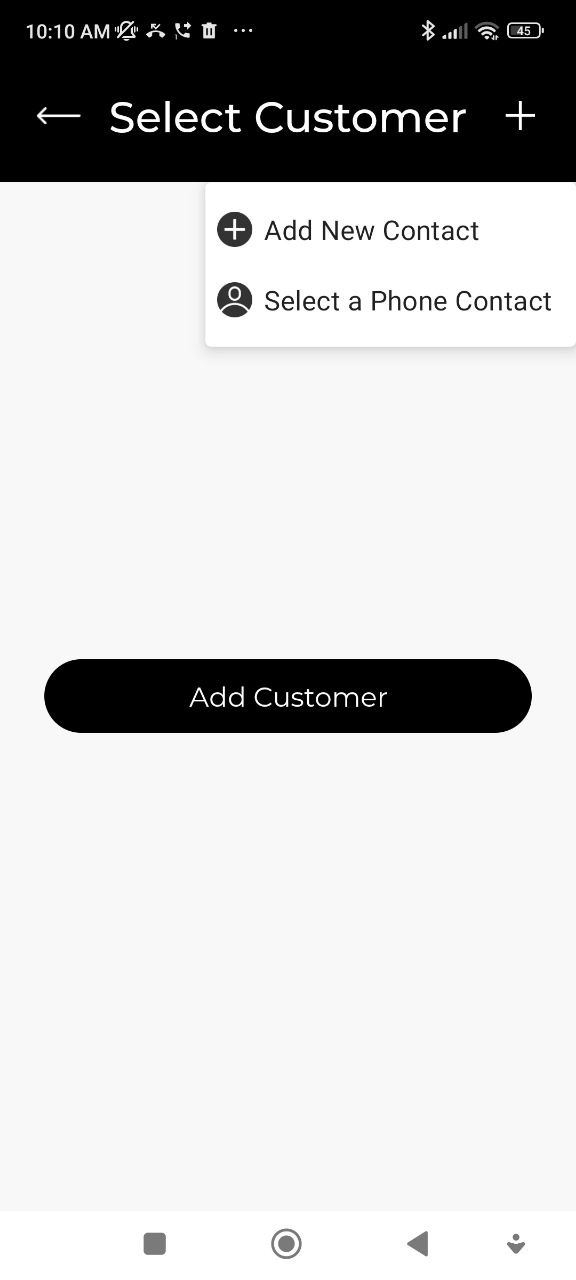
Step 2 — Select or Add a Customer
The Select Customer screen opens. If you have existing customers, search and tap one to select them.
To add a new customer, tap + in the top-right corner and choose:
- Add New Contact — enter details manually
- Select a Phone Contact — import from your phone's contacts
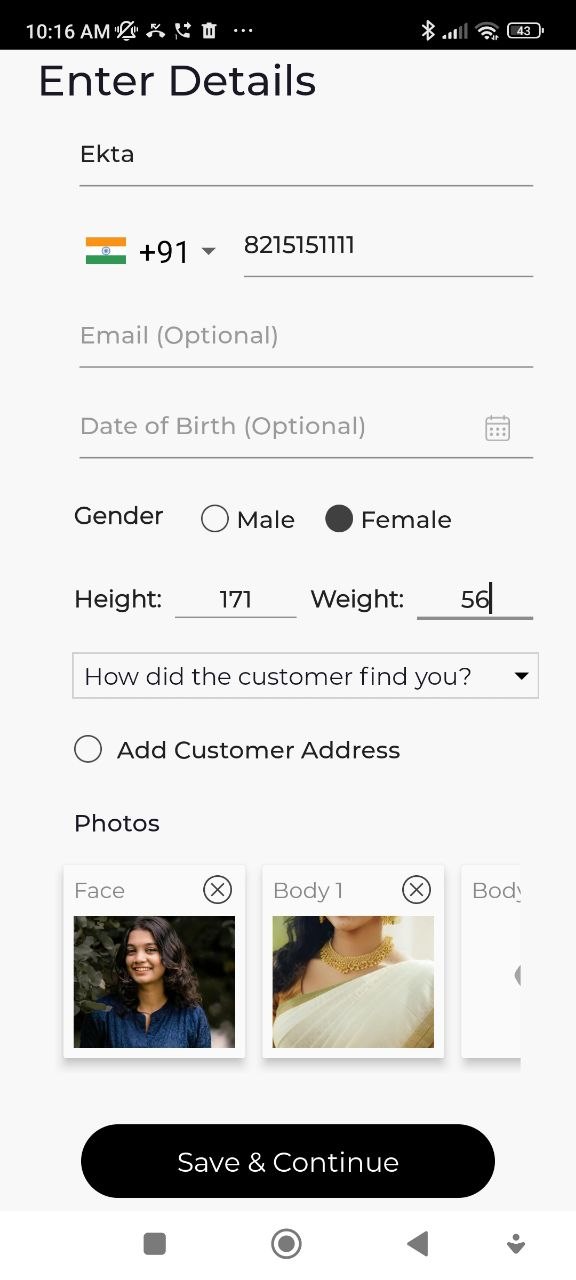
Adding a New Customer
Fill in the customer details:
| Field | Notes |
|---|---|
| Name | Required |
| Phone Number | With country code |
| Optional | |
| Date of Birth | Optional |
| Gender | Male / Female |
| Height / Weight | Optional |
| How did they find you? | Optional |
| Photos | Face and body photos (optional) |
Tap Save & Continue.
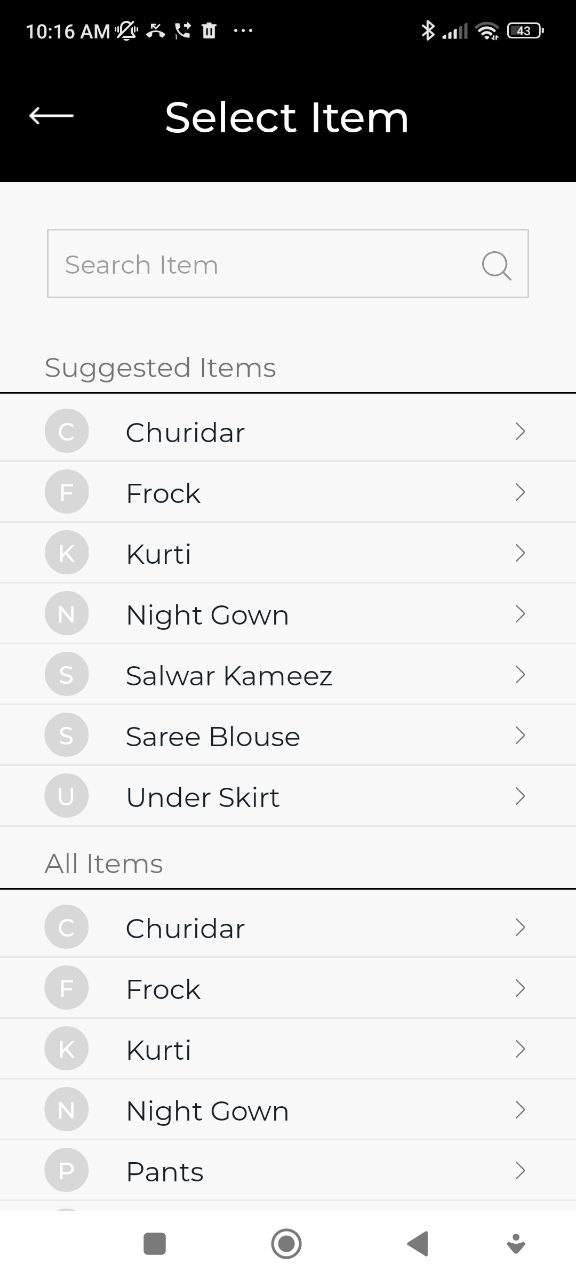
Step 3 — Select the Garment Item
The Select Item screen shows suggested items and the full list. Tap the garment type you are stitching (e.g. Kurti, Churidar, Salwar Kameez).
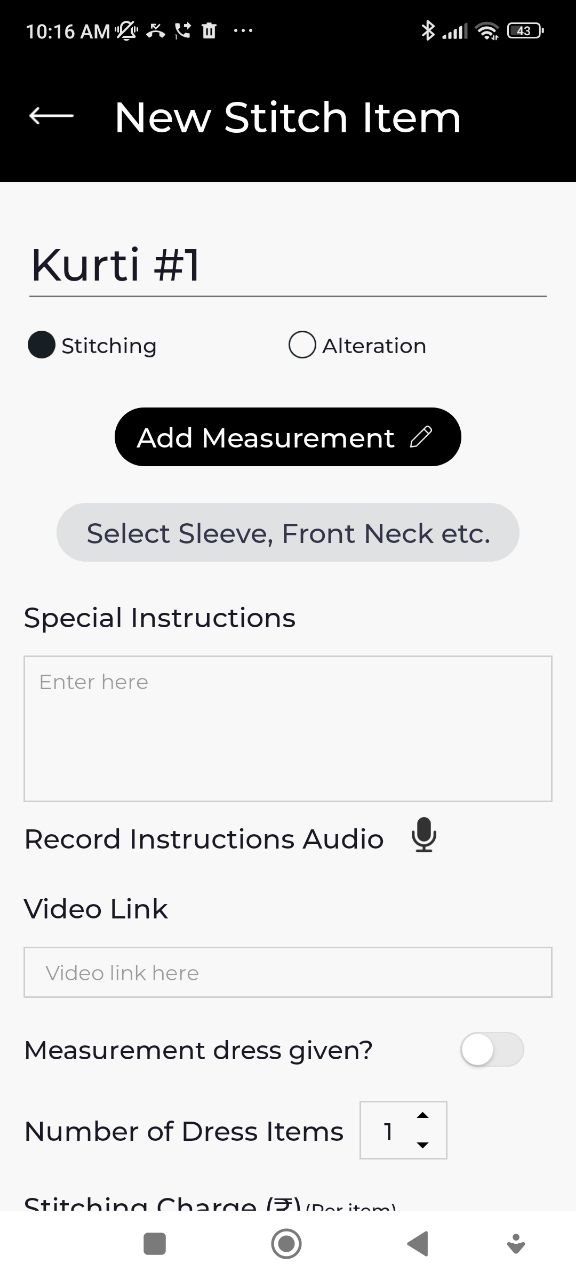
Step 4 — Enter Stitch Item Details
The New Stitch Item screen opens for the selected garment. Here you can:
- Choose Stitching or Alteration
- Tap Add Measurement to enter the customer's measurements
- Tap Select Sleeve, Front Neck etc. to choose stitching style options
- Add Special Instructions as text or record an audio note
- Add a Video Link for reference
- Toggle Measurement dress given if the customer has provided a reference garment
- Set the Number of Dress Items
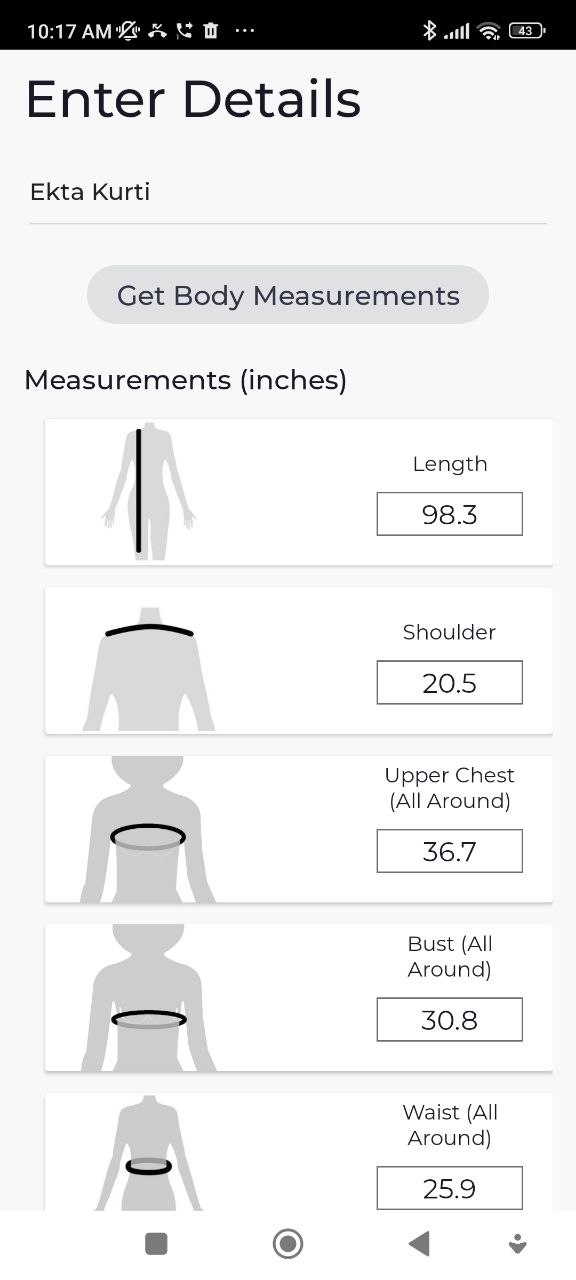
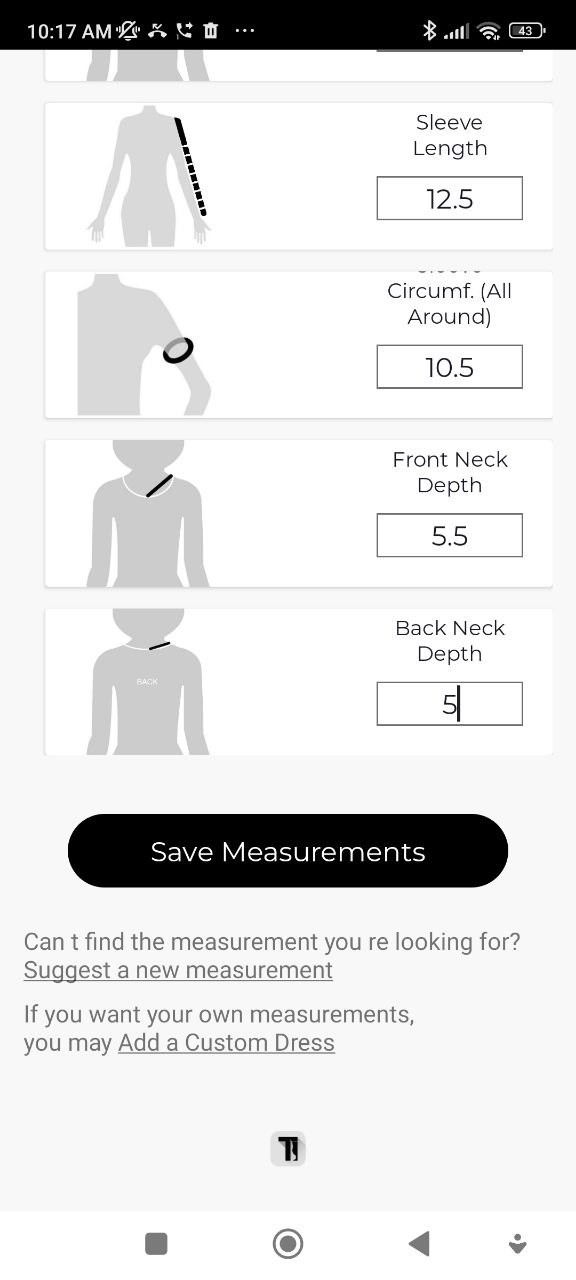
Adding Measurements
Tap Add Measurement to open the measurements form. Enter all relevant measurements in inches (Length, Shoulder, Upper Chest, Bust, Waist, Sleeve Length, etc.). Tap Save Measurements when done.
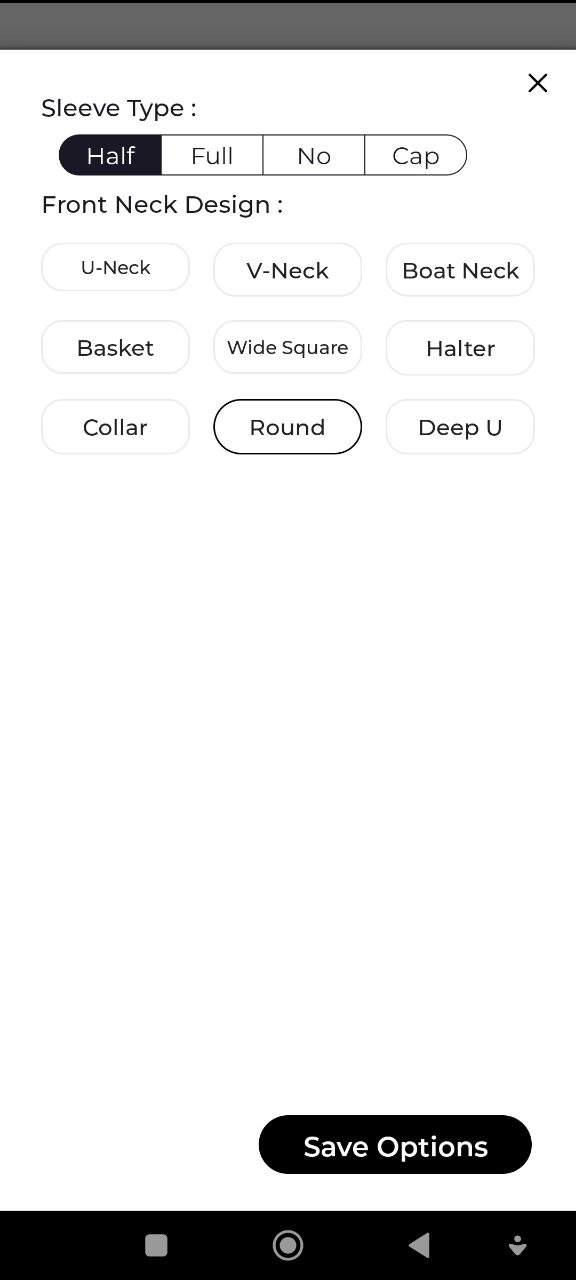
Selecting Stitching Options
Tap Select Sleeve, Front Neck etc. to pick style options such as Sleeve Type (Half, Full, No, Cap) and Front Neck Design (U-Neck, V-Neck, Round, etc.). Tap Save Options.
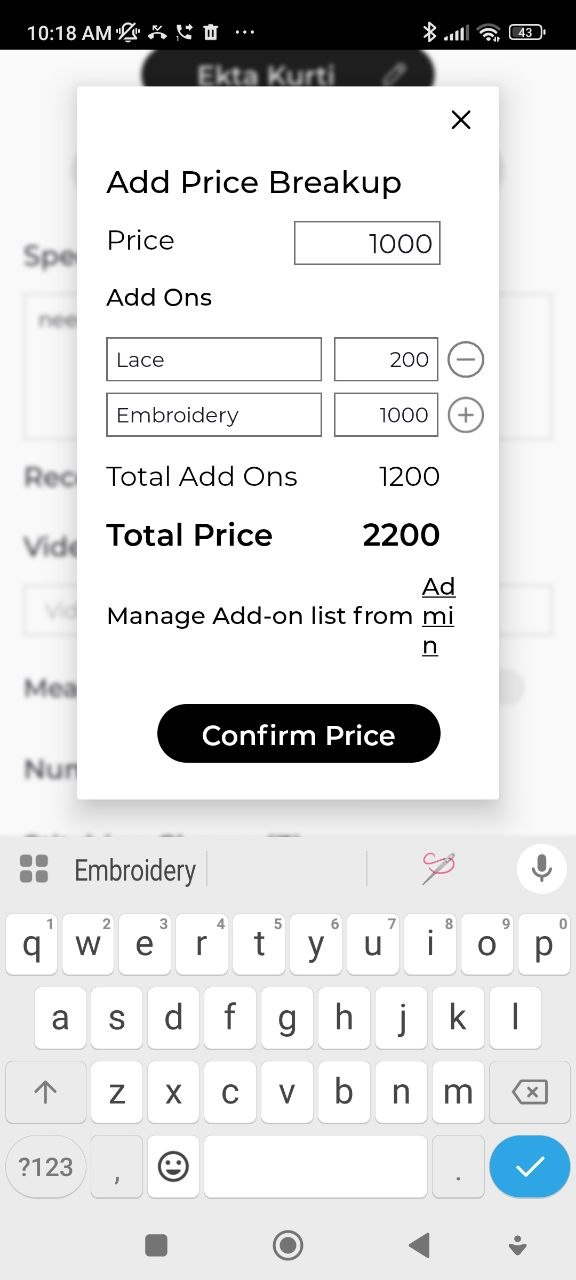
Setting the Price
Scroll down to Stitching Charge. Enter the base price and optionally add line-item add-ons (e.g. Lace, Embroidery) using the Add Price Breakup popup. The total is calculated automatically. Tap Confirm Price.
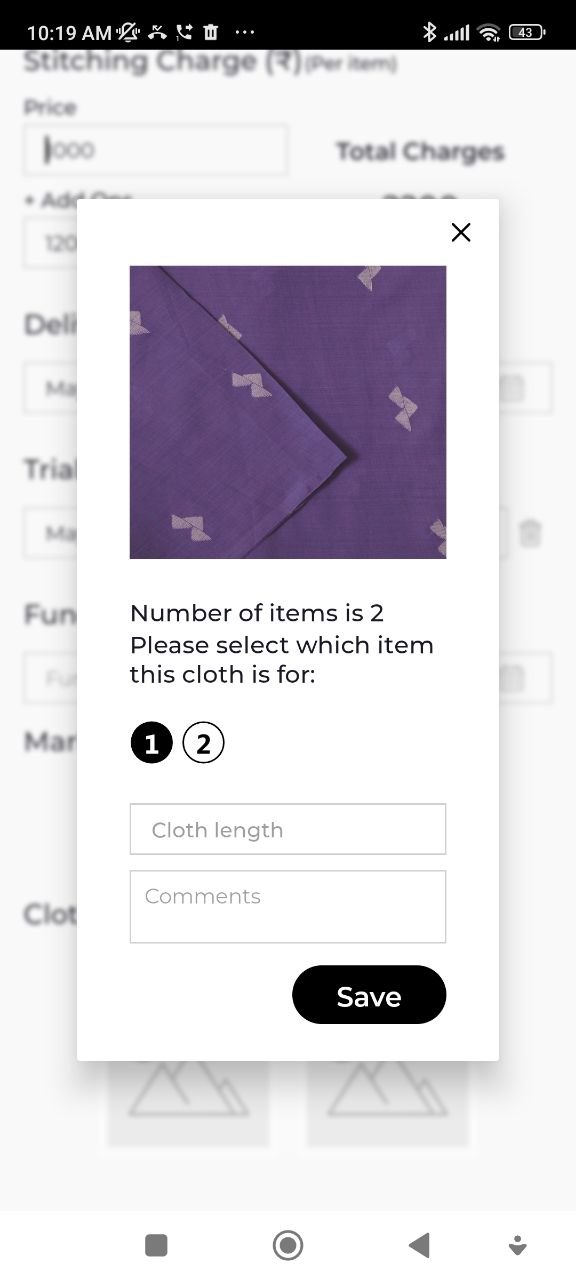
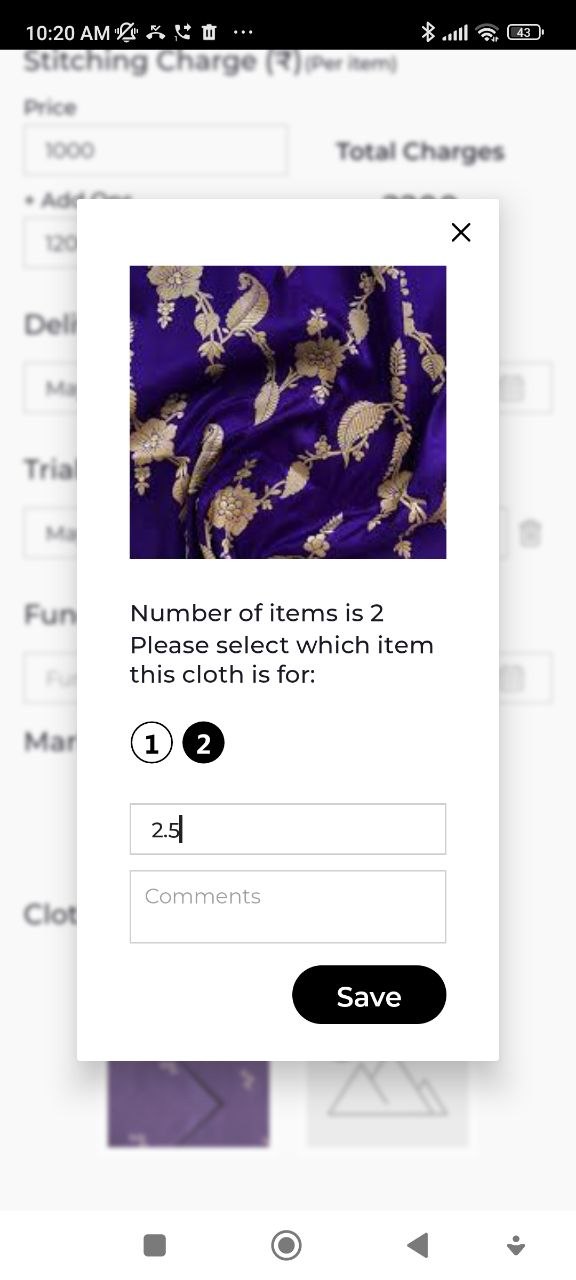
Adding Cloth Images
Tap the cloth image slots to photograph or attach the customer's cloth. If there are multiple dress items, assign each cloth photo to the correct item number.
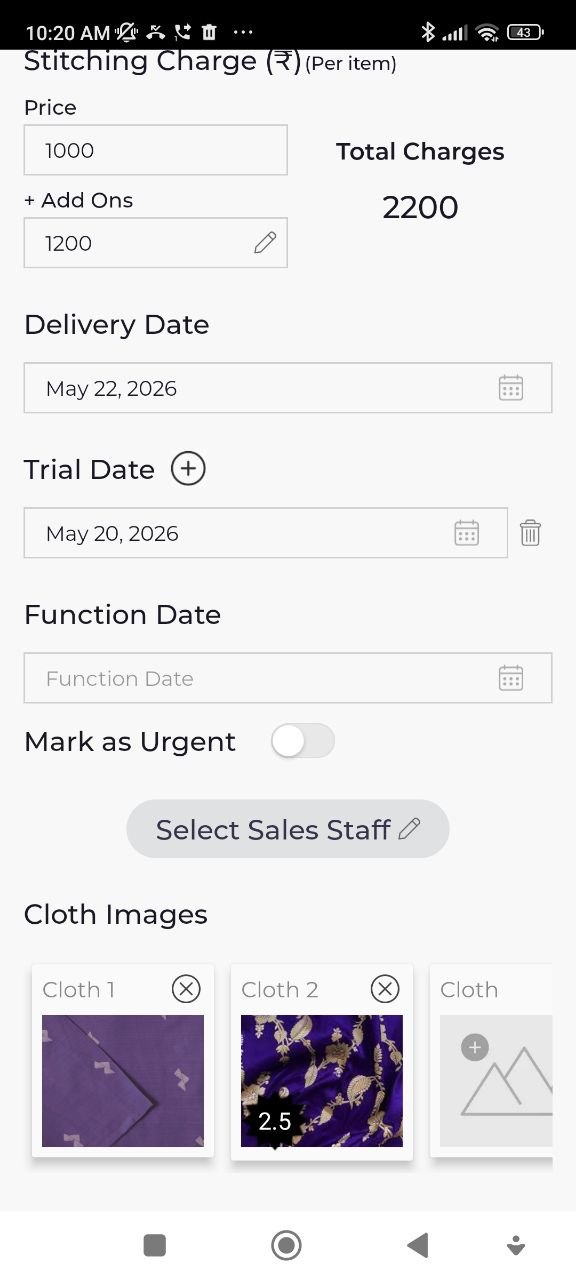
Setting Dates
- Delivery Date — when the order will be ready for pickup
- Trial Date (optional) — for a fitting session before final delivery
- Function Date (optional) — if the garment is needed for a specific event
- Mark as Urgent — toggle on if this order needs priority
You can also assign a Sales Staff member to the order.
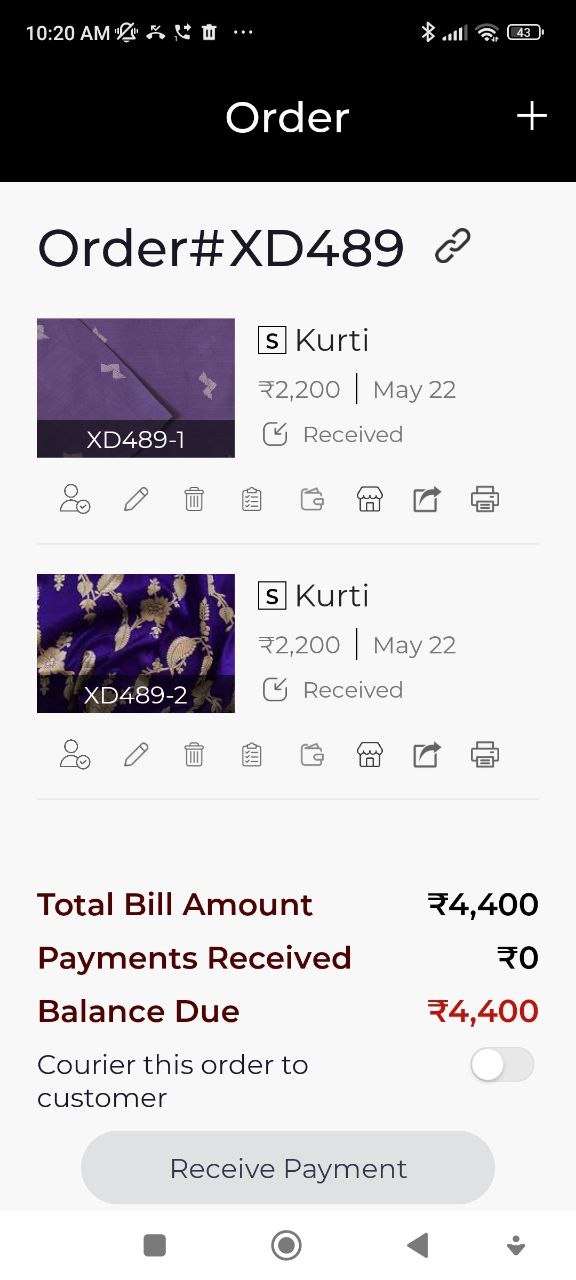
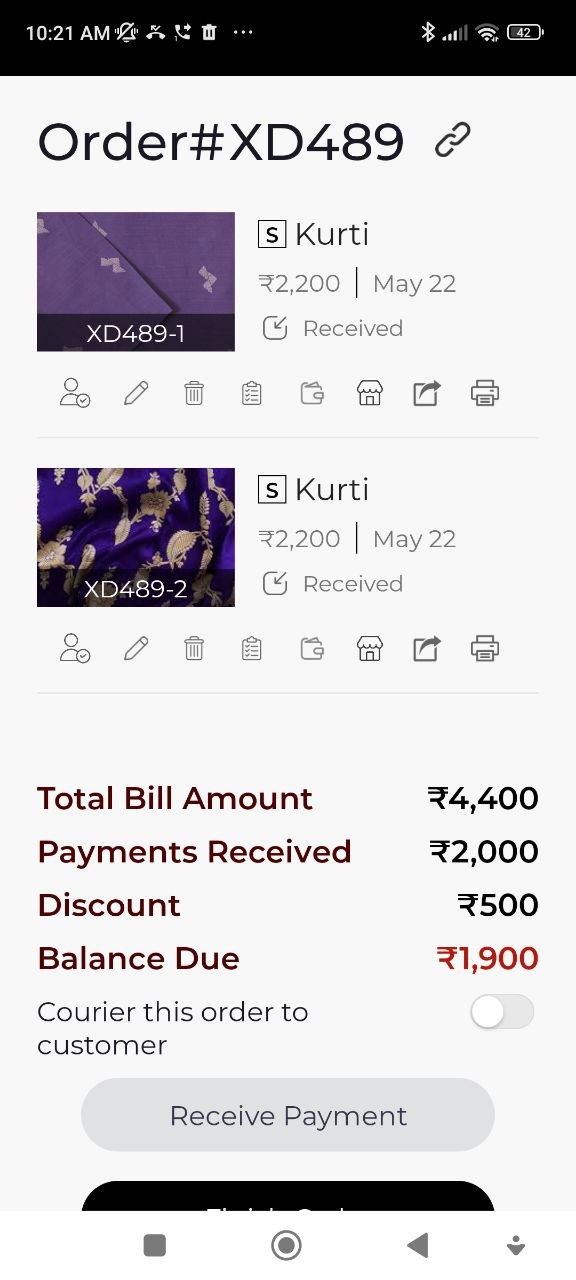
Step 5 — Order Created
Once saved, the order summary screen shows the order number (e.g. Order#XD489), each stitch item with its price and delivery date, and the payment summary at the bottom.
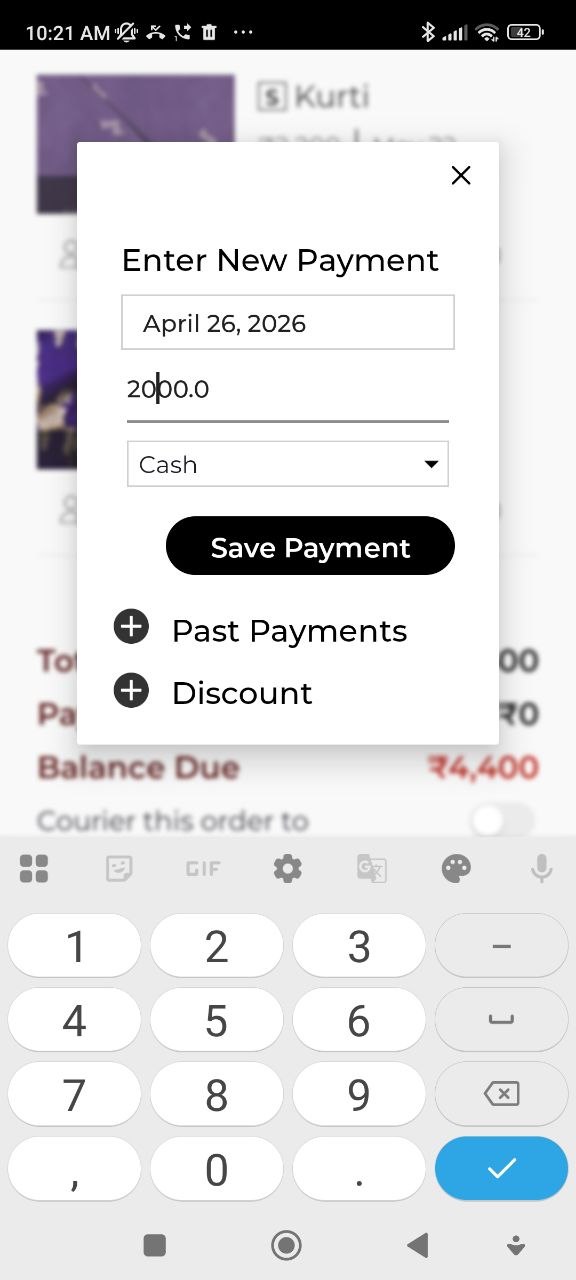
Step 6 — Record a Payment (Optional)
To collect an advance or full payment, tap Receive Payment. Enter:
- Payment Date
- Amount
- Payment Method (Cash, UPI, Card, etc.)
Tap Save Payment.
The order summary updates to show the Payments Received and remaining Balance Due. From here you can also:
- Tap Receive Payment again to record additional payments
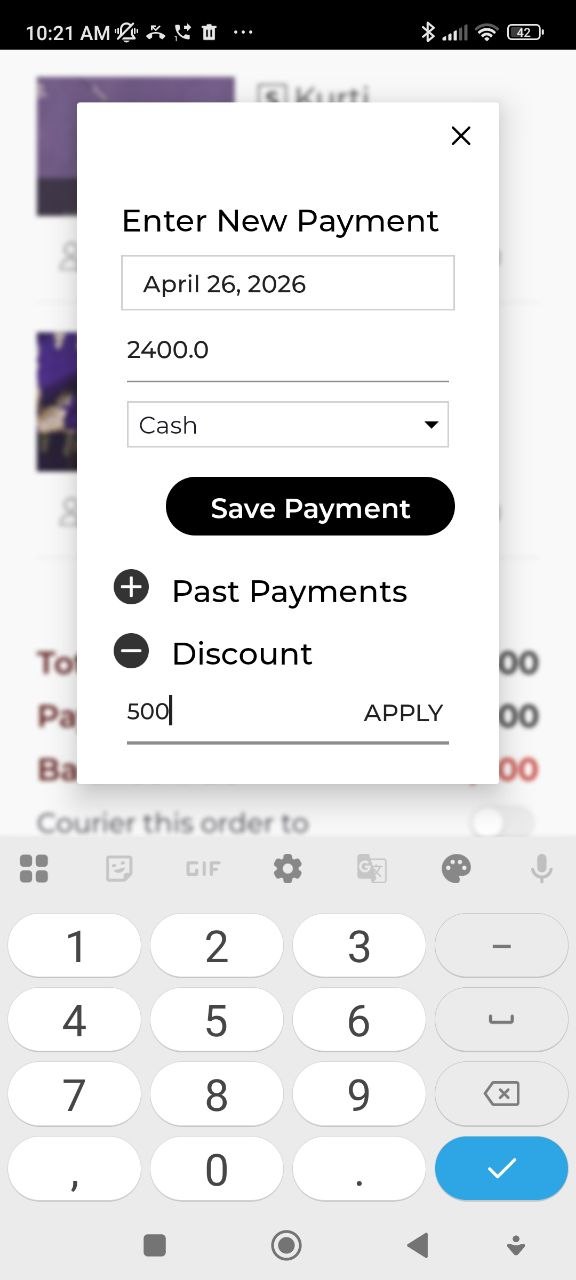
- Expand Discount to apply a discount amount and tap Apply
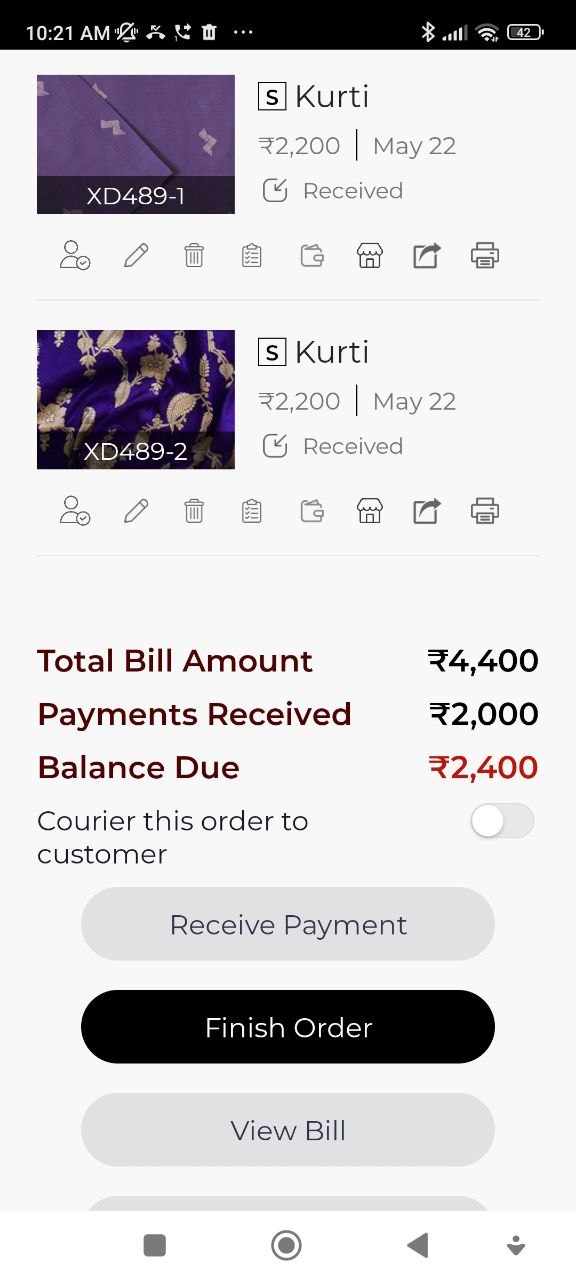
Step 7 — Finish the Order
Once you are done entering all details, tap Finish Order. You can also tap View Bill to preview the bill before finishing.
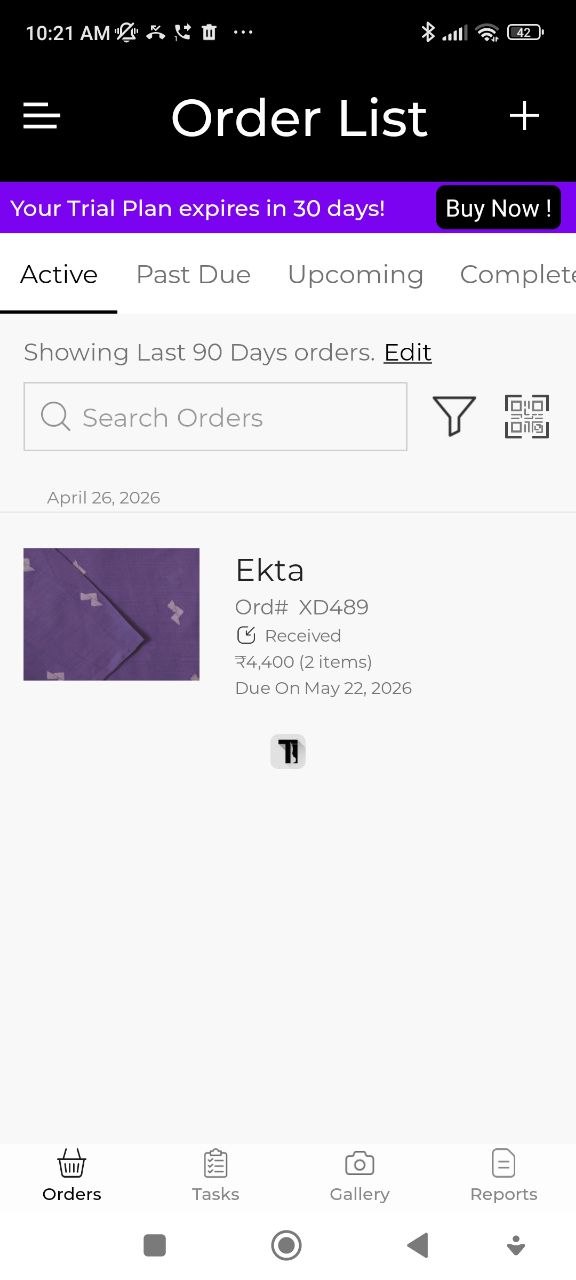
The order is now saved and appears in your Order List under the Active tab with the customer name, order number, status, total amount, item count, and due date.
Returning customers already have their measurements saved — so you can skip straight to Step 3. Just select the customer and their previous measurements will be available to reuse.